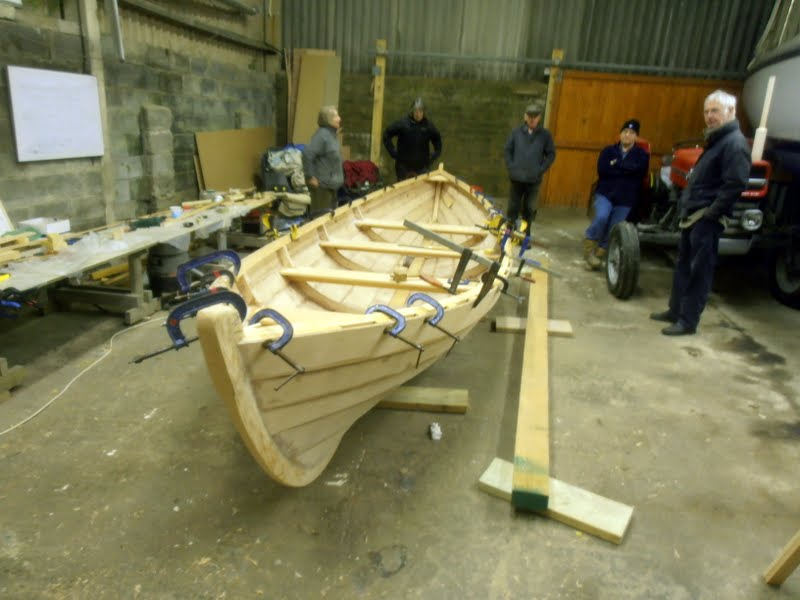
The skiff was turned on Sunday after the final sanding session.
A wee bit more work is needed to fillet in under the thwarts and the breasthooks on the inside, but it was too cold for the epoxy during the week.
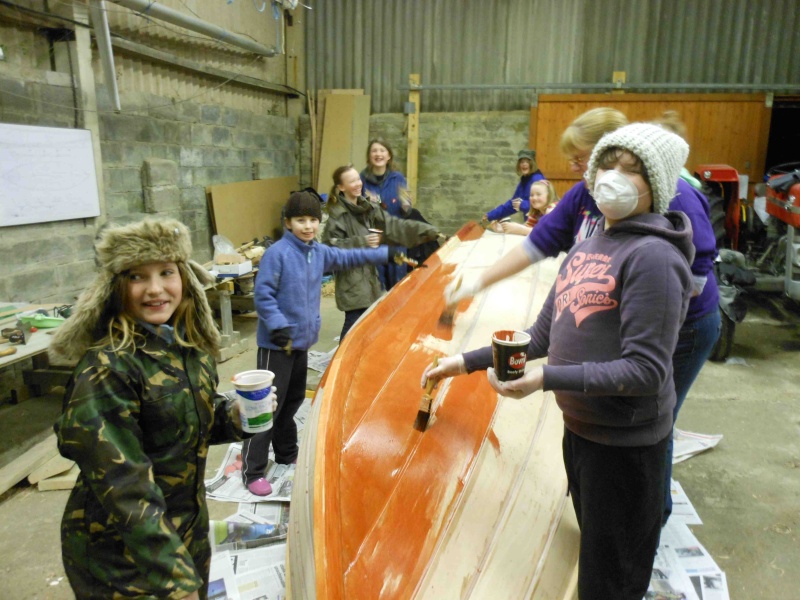
… the average age of volunteers was reduced by decades in one fell swoop! The first coat of thinned down primer went on very quickly with the willing hands of the 1st Kilbrandon Guides.
The final parts of the gunwales are on and will be unclamped. The cox’s seat (improved version, not the fairies’) is in as well. Structurally the hull is complete, just over five months since we started laminating parts, and that includes a long break at Christmas and New Year when it was cold and the fairies were drunk and lazy.
Tomorrow it’s more scraping and sanding, sanding, sanding.
And …
Artists of Seil – Stand by for painting duties!
Update late afternoon 17th
Sanding not quite completed today but a cheerful afternoon was had and another couple of hours will see everything ready for painting. Our lovely Seil skiff deserves the best and another session next Sunday will be enough.
This is taking a bit longer than we bargained for, probably because we were rude about the fairies but maybe also because our work at these critical points is highly visible and has to be right.
We had to put the inwales in two stages as we didn’t have sufficient clamps to do the lot at one go and unthinkingly did a complete side first, but it would have been better to glue in two forward or two aft pieces together, as we could have then ensured they fitted each they perfectly. As it was although everything was fine on the dry run we had to re-trim one end of the second side when we came to glue it in, as its partner had slid forward a couple of millimetres.
Now we’re absolutely on the last lap with the external pieces almost ready for glueing. Again the shortage of clamps means one side at a time and we’ll try to get at least the first one done before Sunday, when there will again be plenty to do.
Today the inner parts of the gunwales were cut to length and scarfed for gluing up during the week. This just leaves the outer strips, which may well be done by some fairies before next weekend.
We’re not too sure about this, as we found that they had tried their hands at building a seat for our cox.
We’ve drawn up a shortlist of ten names from suggestions made by the school, by shareholders and by members of the building team. The names are going to be published in this month’s Seilachan.
( Some Gaelic translations: Sguman = skimmer Mara = sea Siaban = sea-spray, spray, spume, spindrift )
There are two polls, for first choice and second choice. In the event of a tie second choices will be taken into account.
The poll closes on the 28th of February.
What is your first choice for a name for the skiff?
Yesterday we cut the scarphs and shaped the ends of the outer inwhale pieces and test-fitted them. We also shaped the breasthooks.
Today we had intended to glue up the outer inwhale pieces both sides, using brass screws to fix the inwhale pieces to the short blocks and so leaving us plenty of clamps to clamp the pieces to the long blocks. However, the screws were not man enough to pull the rail in tight against the blocks so we ended up using all the clamps (over 30) on one side. We will do the other side tomorrow.
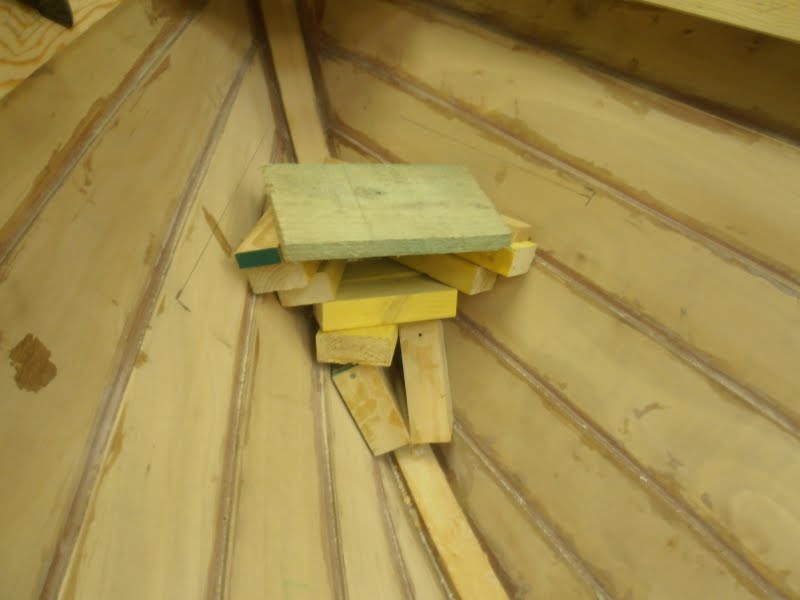
Today we began to glue the small inwhale support blocks in place. The main purpose of this construction is to leave holes for water to drain out if the boat is left inverted; this is a place wooden boats that tend to get left upside down often rot. With holes all the way along the outer edge of the inwhale water will be able to drain freely.
The blocks are 3″ and they are spaced with approximately six and a half inch gaps. (The actual spacing varies slightly due to the position of frame tops and and the long oar support pieces). We ended up with 15 pieces per side; due to a shortge of clamps we decided to do one side at a time.
Short blocks glued and clamped, starboard side
As usual there was a lot of cleaning up of squeezed-out glue afterwards, which is used to fill any gaps and smooth wee fillets along sharp corners.
You can get an idea of what the finished gunwhales will look like from this picture of the Queensferry skiff ‘Ferry Lass’ at her launch:
Today we glued the inner halves of the long blocks in place. These long blocks are deisgned to provide structural support for the thole pins / rowlocks or whatever mechan ism we eventually use to connect the oars to the boat.
(Remember these were split to avoid causing flat spots when gluing and clamping – if you look in the photo you can see that each long block is in two halves).
Much technical discussion today on the best way to set up the inwhales and gunwhales. Originally we had thought of not bothering with an outer gunwhale, but we need a rubbing strake that will – well – ‘rub’ – an easily repairable semi-sacrificial strip of wood on the outside round the top of the sheerstrake.
We roughtly cut the eight pieces of douglas fir for the inwhales (two pieces will be scarfed together for each side, then doubled up to get the thickness). The scarfs will be positioned on one of the long blocks for extra strength. This then left enough spare wood to cut the small 3″ spacer blocks.
We then glued the outermost split halves of the long blocks in place – but before we did this we discovered that the tops of the frames were generally slightly high by various amounts, so these were marked up and amounts between one and three mm taken off with the Japanese pull saw, angle grinder and chisel.
Trimming the tops of the frames
Once we had glued the split long blocks in position we had a look – no flat bits along the sheer at all, so the extra hassle has been worth it. Tomorrow the fairies will hopefully glue the inner halves of the long blocks in position.